Burton and Ashby Light Railways
History
The 3ft 6ins-gauge Burton and Ashby Light Railway(s) was in fact an overhead electric tramway, which was owned and operated by the Midland Railway Company. The tramway was opened in stages, services commencing on the 13th June 1906, with completion on the 15th October.
Proposals for a tramway system between Burton and Ashby had first been made in 1899, and though the promoters secured the support of the MRCo, which already had network of lines in the area, the Light Railway Order ultimately failed due to objections from the respective councils. Another scheme was put forward in 1902, this time with the support of the various councils, but now opposed by the MRCo; however, after discussions with the promoters, the MRCo eventually took the scheme over, receiving powers for the tramway on the 5th November 1902. The railway company doubtless saw the potential benefit of taking people to and from its various railway stations, the tramway serving one at each of its three termini, as well as two others in-between. It is unclear why, but work did not start on construction until over two years later in February 1905.
As completed, the tramway extended to 10.12 route miles, essentially consisting of a long main line running southeastwards from Burton-upon-Trent in Staffordshire, via the Derbyshire town of Swadlincote, to Ashby-de-la-Zouch in Leicestershire. At Swadlincote, the tramway formed a large triangular junction with the branch to Castle Gresley, the top arm being the main line, and the other two arms meeting at Church Gresley, one branching off at the main line at the Delph in Swadlincote and the other at Woodhouse Road Junction not far from Woodville. At the Burton borough boundary near Winshill, the tracks of the B&ALR met those of Burton-on-Trent Corporation Tramways, the company agreeing terms with the corporation to run through to a terminal stub in Wellington St (near the Town Hall). The BCT itself did not run any services over B&ALR lines.
The company ran the service with 20 open-topped cars, which it never saw fit to top cover, even though a journey on the top deck must have been absolutely horrendous in adverse weather, given the open nature of the terrain and the speed at which the trams careered down the reserved track section. Despite this shortcoming, the tramway was heavily used and presumably very profitable, the only retrenchment being the closure of the Church Gresley to Woodhouse Junction section of the Swandlincote Triangle in November 1912, which had by this time fallen out of use.
The Great War impacted the tramway in the same way as almost all others across the country, the system losing men (and their skills) to the armed services, and having to reduce maintenance as a consequence. The situation was further worsened by severe shortages of spares and government restrictions on the purchase of track and tramcars. As a result, the tramway emerged from the conflict in run-down condition, on top of which it made its first loss (in 1919), despite carrying around 3 million passengers. However, a complete overhaul of the services, turned the undertaking around, the post-war operating costs, which had been very high, being brought firmly under control.
The undertaking became the property of the London Midland and Scottish Railway Company on the 1st January 1923, when the MRCo was merged with several other companies at the 'railway grouping', forming one of the so-called 'Big Four'. Although the new railway company inherited a profitable tramway, things did not remain that way for long. Due to the system's rural nature, it was particularly susceptible to motorbus competition, which intensified throughout the early 1920s, becoming acute by the middle of the decade, the tramway reducing services in an attempt to stem the losses. The LMSR was in no mood to absorb the losses indefinitely, so it perhaps came as no surprise to anyone — other than to Burton-upon-Trent Corporation, who the B&ALR had apparently neglected to inform — when tramway services were withdrawn completely on the 19th February 1927.
The tram services were replaced by motorbuses of the Birmingham & Midland Motor Omnibus Company (known as 'Midland Red'), in which the LMSR would eventually take a 25% stake (on the 24th April 1930).
Uniforms
Motormen and conductors were issued with single-breasted jackets with five buttons (of the standard Midland Railway 'wyvern' pattern; see link), two breast pockets (with button closures), epaulettes (with button fastening) and upright collars. The latter carried an employee number on the bearer's left-hand side (in individual metal numerals) and system initials — 'B & A L R' — in individual metal letters (on the right-hand side); these badges were more than likely nickel to match the standard-issue Midland Railway buttons. Unusually, this style of uniform remained unchanged throughout the entire 20+ years of the tramway's existence, spanning both the MRCo (1906 to 1922) and LMSR eras (1923 through to closure in 1927).
Caps were military in style with a glossy peak and a tensioned crown (top); they carried a one-piece 'B&ALR' initials cap badge, above which a standard Midland Railway 'wyvern' badge was worn (see below); both of these badges were almost certainly nickel.
Following the 1923 railway amalgamation, which created the LMSR, the sole change made to the uniforms appears to have been to replace the cap and collar badges with plain, LMS 'block initials' badges, again almost certainly nickel. Otherwise, the uniforms appear to have remained the same, save for the replacement of Midland 'wyvern' buttons with standard LMS 'coat of arms' buttons (see link).
Motormen and conductors were also issued with long, double-breasted greatcoats with five pairs of buttons and high fold-over collars; in Midland Railway days, the latter appear to have carried an employee number on the left, and initials — probably 'B&ALR' — on the right, in similar fashion to the jackets worn underneath. Following the 1923 amalgamation, the greatcoats appear to have been worn without insignia of any kind. At least in the early days, motormen were also issued with sou'westers, which they would certainly have needed on the long cross-country stretches, though unfortunately, no photographs of them being worn appear to have survived.
Inspectors wore single-breasted jackets with hidden buttons (or more likely a hook and eye affair) and upright collars, the pockets and jacket being edged in a finer material than the main body; the collars carried the bearer's grade on both sides — Inspector — in embroidered script lettering. Caps were identical to tramcar staff, and appear to have borne a grade badge — Inspector — though whether this was embroidered or metal is currently unclear. Another badge was certainly worn above the grade badge; this badge could have been either the standard 'wyvern' badge, or by analogy with later years, a rope-effect, script lettering 'MR' badge. The only change made during the LMS era was to the cap badges, which were changed to standard LMS rope-effect, script-lettering badges (see photo below), the lower one with the bearer's grade — Inspector — and the upper one a system initials badge, LMS. These were more than likely nickel.
During the Great War, and in common with many tramway systems across the United Kingdom, the B&ALR employed female staff — as conductresses — to replace men lost to the armed services. These ladies were issued with long, single-breasted jackets with four buttons, four pockets (with button closures), epaulettes and lapels, none of which appear to have carried any insignia; long matching skirts were also issued. Headgear consisted of a large baggy cap with a glossy peak, which carried the same badges as those used on the caps of their male colleagues. A photo has also survived (see below) of a conductress in a long double-breasted overcoat with wide, piped lapels, and a bonnet with a wide brim. The photo is thought to depict a B&ALR conductress, though the complete absence of cap badges and the different style of hat, would suggest that this attribution may be incorrect.
Further reading
For a history of Burton and Ashby Light Railways, see: 'Sixpenny Switchback' by P M White and J W Storer; J M Pearson & Son (1983).
Images
Motormen and conductors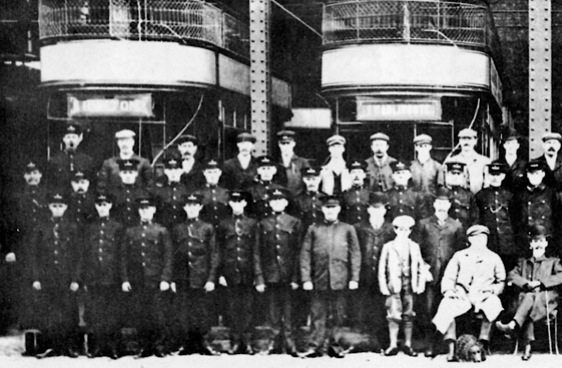
Left-hand half of a large staff photo taken at Swadlincote Depot on the opening day of the system, 13th June 1906. In all probability, the entire staff are depicted, many of whom can be identified (see 'Sixpenny Switchback'; referenced above). Photo courtesy of the Tramways and Light Railway Society, with thanks to David Voice.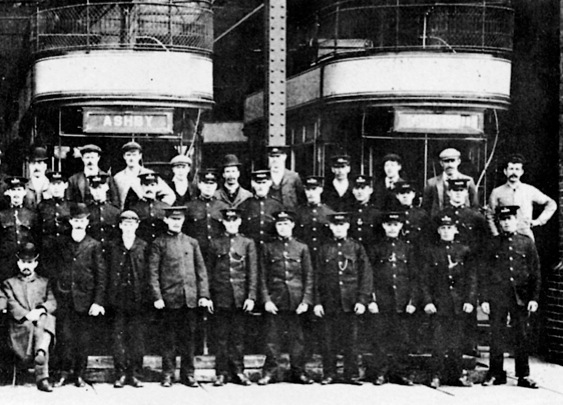
Right-hand half of the aforementioned photo. The seated figure at the extreme left is Mr Baldwin, the Traffic Superintendent. Photo courtesy of the Tramways and Light Railway Society, with thanks to David Voice.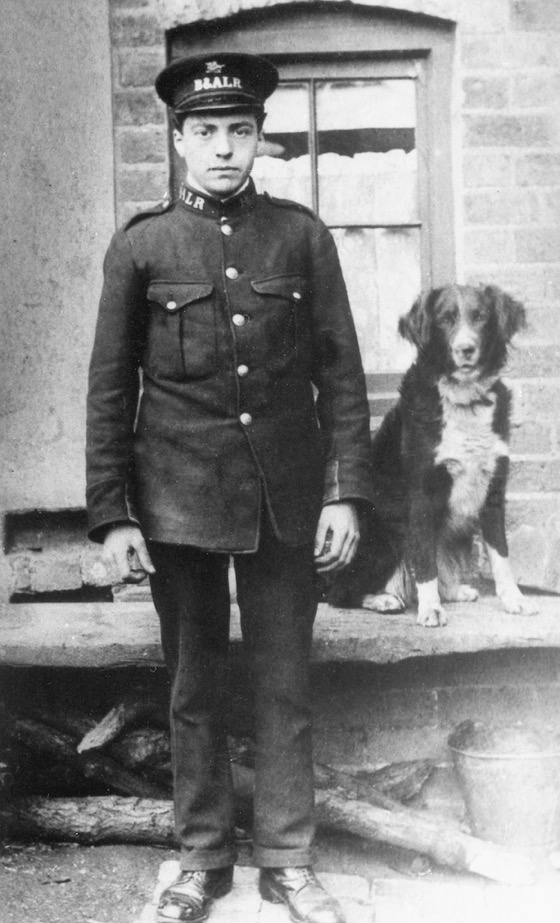
B&ALR conductor Harold James pictured with his dog (presumably) at his home — photo undated, but probably late Edwardian. Mr James later moved to the US, working on a Detroit-area inter-urban tramway, the 'Sandwich, Windsor and Amherstburg Railway Company'. With thanks to the National Tramway Museum. 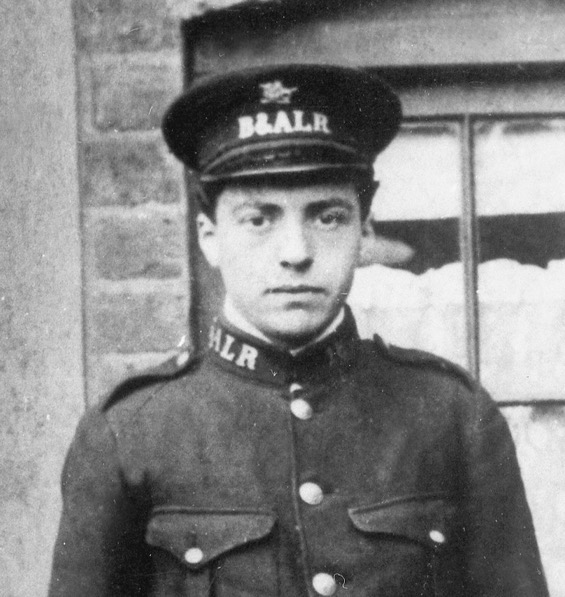
A blow-up of the above photo showing details of the uniform and cap insignia. His left-hand collar carries an employee number — possibly '16' — whilst the right-hand side bears individual system initials, 'B & A L R'. The cap has what would appear to be a one-piece 'B&ALR' badge, above which is a standard Midland Railway 'wyvern' badge.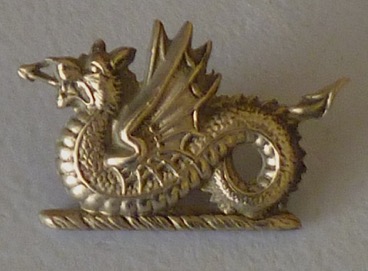
Midland Railway 'wyvern' cap badge — nickel; worn between 1906 and 1923. Author's Collection.
Midland Railway 'wyvern' cap badge — brass. Although there is currently no evidence to suggest that tramway staff (including inspectors) ever wore brass insignia, it remains a possibility. Author's Collection.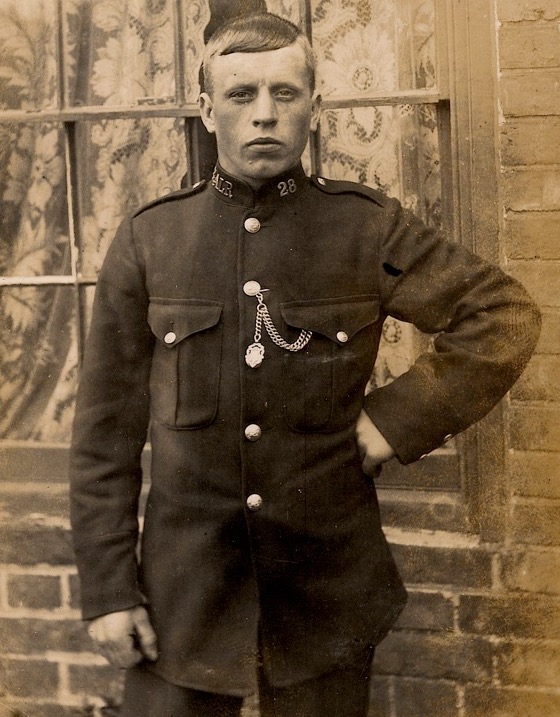
Burton and Ashby employee No 28 — photo undated, but definitely taken before 1923. The collar insignia — employee number and 'B&ALR' initials — are clearly seen, whilst magnification also confirms that standard Midland railway 'wyvern' pattern buttons (see link) were worn. With thanks to John Burford.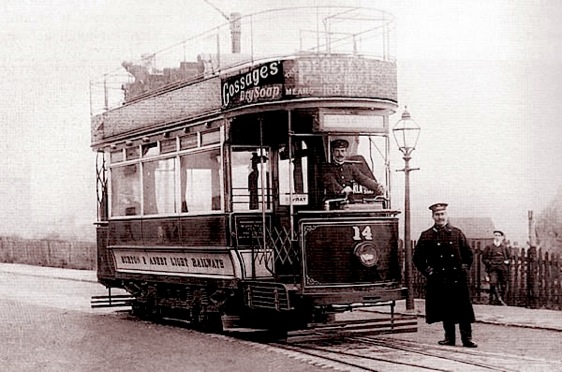
The crew of Tramcar No 14 captured near Gresley Common — photo undated, but given the pristine condition of the tram, probably Edwardian. The conductor, Leonard James, is actually at the controls, whilst the driver, Charles Wells, stands in front. Photo courtesy of the Tramways and Light Railway Society, with thanks to David Voice.
An unusually informal shot of B&ALR conductor Fred Parnham (possibly Employee No 6) on the platform of an unidentified tramcar — photo undated, but certainly taken between 1923 and 1927 (Mr Parnham was still with the tramway at closure). His right-hand collar and cap bear standard 'LMS' block-lettering badges, whilst the rest of the uniform is unchanged from Midland Railway days. With thanks to the National Tramway Museum. 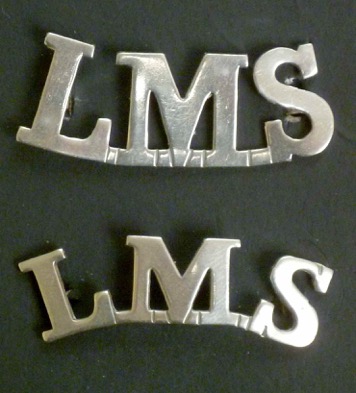
LMS block initials cap and collar badges — nickel. Author's Collection.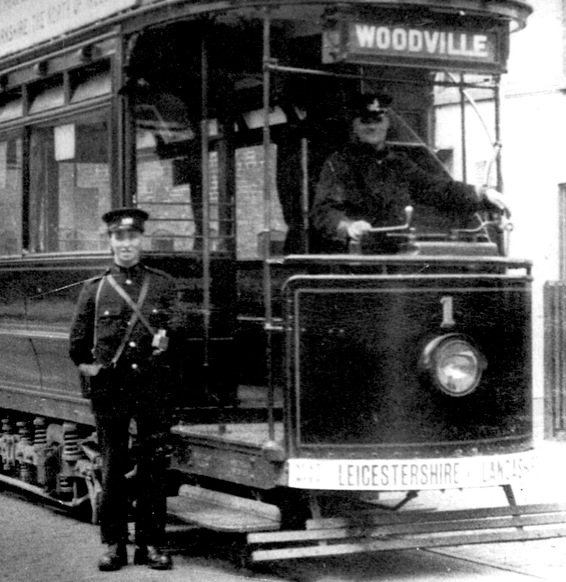
Tramcar No 1 stands outside the Joiners Arms in Woodville High Street — photo undated, but either taken in June 1924 or 1926, as these are the only two dates when Leicestershire played Lancashire at the Bath Grounds, Ashby-de-la-Zouch (see advertisement on the bottom of the tramcar dash). The tramcar is in LMSR livery, and both men are wearing 'LMS' block-lettering cap badges. The conductor is Reg Adey and the motorman is Richard Shipton; the latter worked on the tramway for its entire existence (1906-1927). Photo courtesy of the Tramways and Light Railway Society, with thanks to David Voice.
Senior staff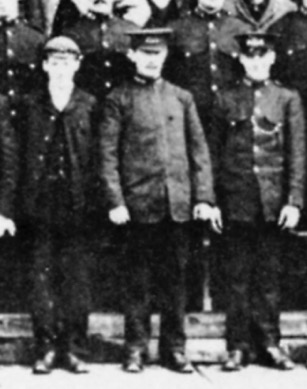
A blow-up of the 1906 staff photo above. Whilst the image is of poor quality, it is good enough to discern the style of uniform issued to inspectors, which seems to have remained unchanged throughout the system's entire life.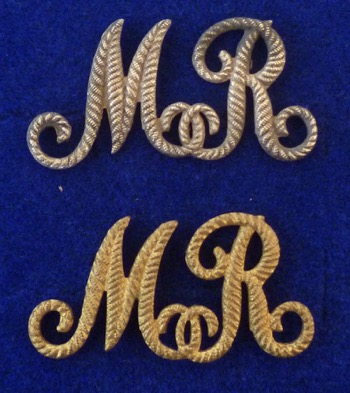
Midland Railway rope-effect, script-lettering cap badge — nickel (top) and brass (bottom). By analogy with a studio portrait of an inspector taken in the LMSR era (see below), it is possible, though by no means certain, that inspectors during the MR era wore this badge above their grade badge. Author's Collection. 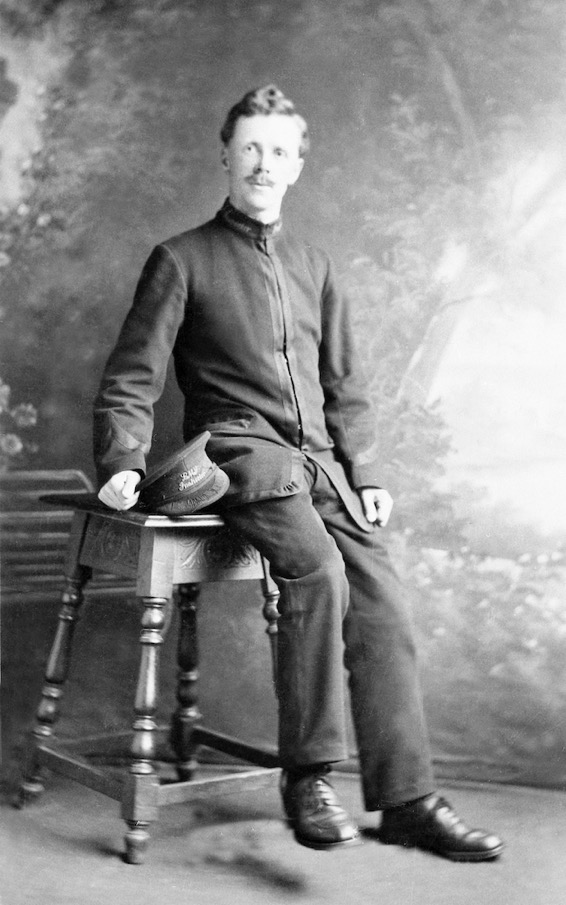
A rare studio portrait of an inspector, John Armstrong — undated, but certainly taken between 1923, when the LMSR came into being, and 1927, when the tramway closed. With thanks to the National Tramway Museum. 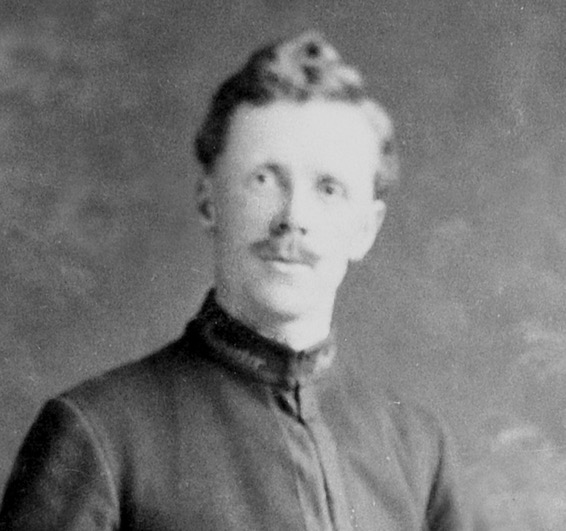
A blow-up of the above photo showing details of the collar insignia —Inspector — in embroidered script-lettering.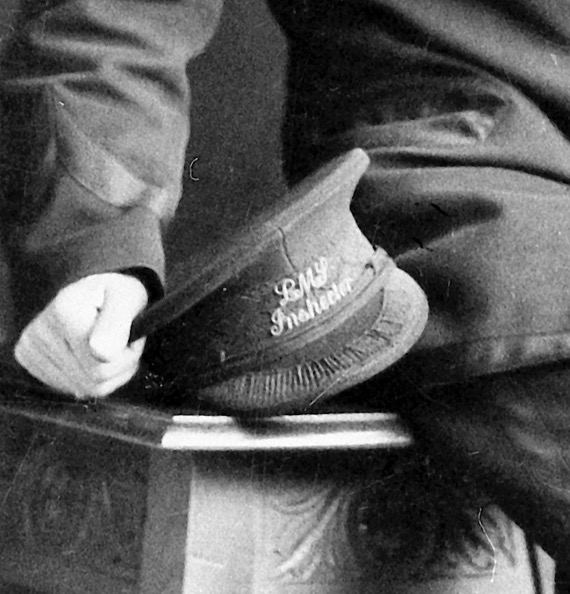
Another blow-up of the above photo showing details of the cap badges, both of which appear to be of the LMSR's rope-effect script-lettering pattern, probably nickel.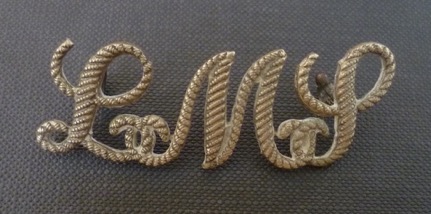
Rope-effect, script-lettering cap badge of the type worn by B&ALR inspectors from the railway grouping of 1923, when the 'LMSR' was created, onwards — nickel. Author's Collection.
Female staff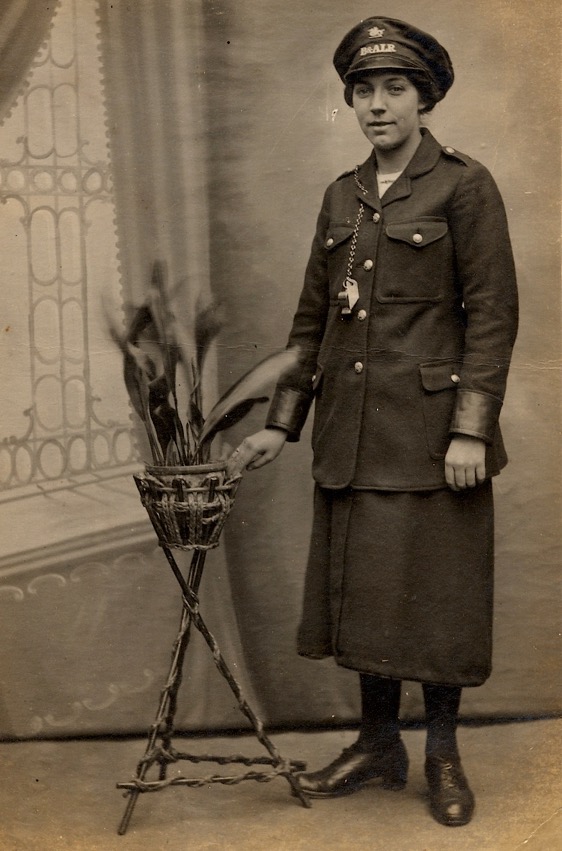
Conductress May Sutherns from Woodville — photo undated, but almost certainly taken during the Great War. With thanks to John Burford.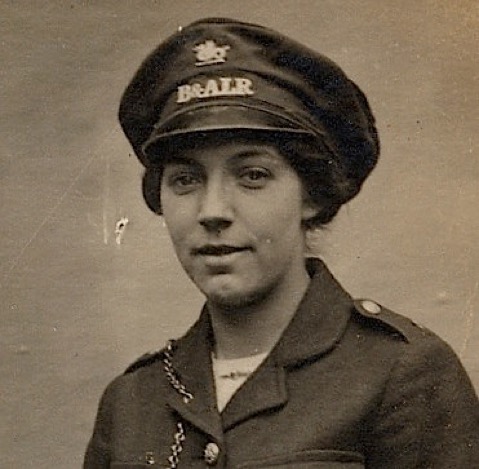
A blow-up of the above photo showing the one-piece 'B&ALR' cap badge and the Midland Railway 'wyvern' badge above it. The jacket lapels, collars and epaulettes are all unadorned, i.e., left plain.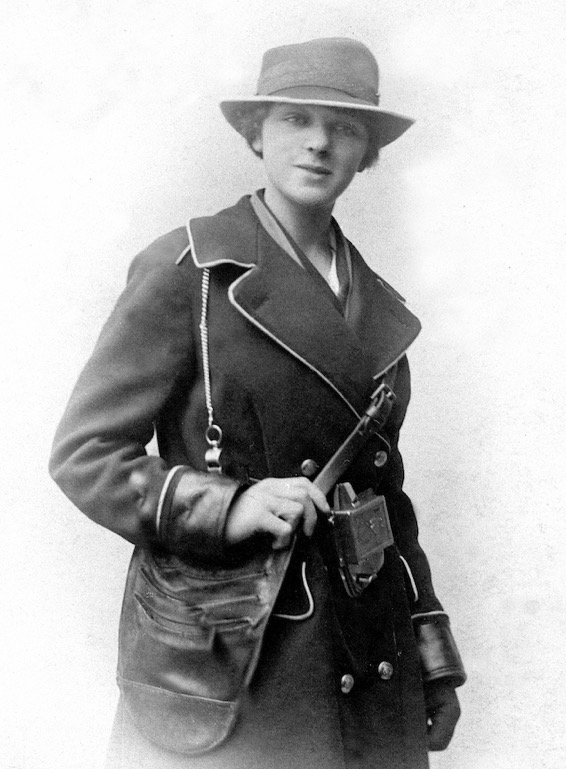
Conductress Violet Parker, purportedly a B&ALR Great War tram conductress, though this seems unlikely given the absence of any insignia — photo believed to have been taken around 1918. With thanks to the National Tramway Museum.